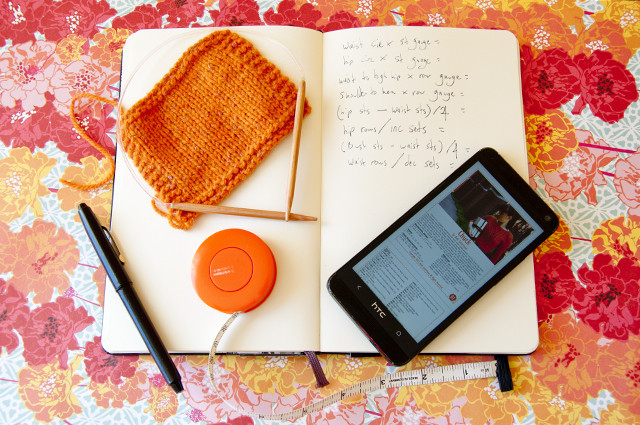
Cropped sweaters don’t fit easily into everyone’s wardrobes, so it’s not surprising that a lot of people choose to modify them and make them into full length sweaters. There are a few different options for doing that. One method is to take the distinctive elements of the cropped sweater and combine them with a well-fitting, basic, full-length sweater pattern. A few of my friends are fond of using patterns generated through Amy Herzog’s Custom Fit software as their basic pattern, and then they combine them with the distinctive design elements of another pattern. It’s a great way to do things because a lot of the confusing parts like ease have been figured out for you, and all you need to do is adjust for the distinctive elements. The other best option is to calculate the changes to the body yourself! Here’s how to do that.
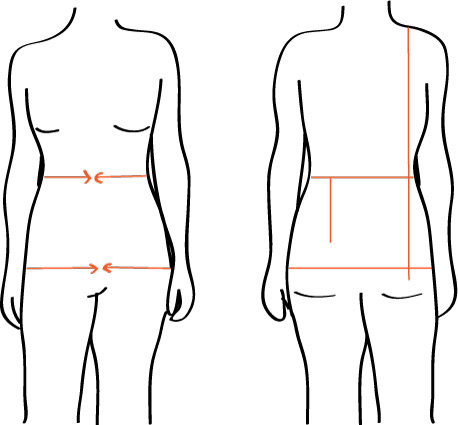
+ Take your waist and hip circumference measurements and your total length and waist to high hip measurements.
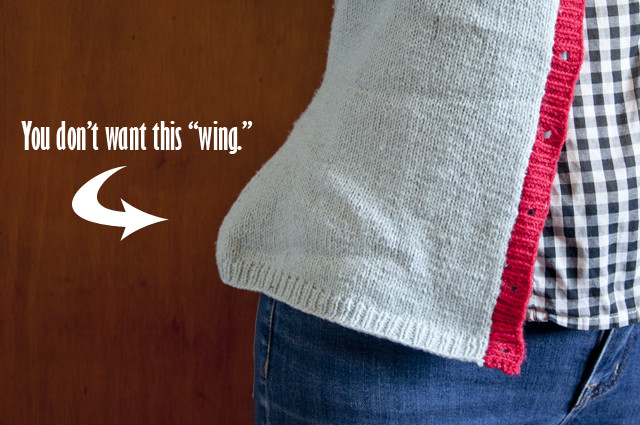
+ Plan the ease for your waist and hips. Odds are good that the waist shaping will need to be recalculated because the kind of extreme waist shaping that can be accomplished on a cropped sweater may leave you with too many hip increases to work in a short space. Rapid shaping at the hip can distort the straight line of the bottom of a sweater, and it can cause hip “wings” on a open cardigan where the cardigan stands away from the body at the hips instead of falling with the body. This can also be prevented by adequately distributing the shaping using additional darts, but the easiest way to avoid this problem is incorporate more ease through the waist so less shaping is required. When calculating waist shaping for full-length sweaters, it sometimes works best to figure out how much hip shaping can be easily incorporated and then work backwards to get the sweater’s waist circumference. If you want the sweater to fit with negative ease through the hips, subtract from the hip measurement. If you want the sweater to fit with positive ease through the hips, add to the hip measurement. If you want the sweater to fit with zero ease, keep the hip measurement as it is.
+ Multiply the waist and hip circumference by your stitch gauge to get your target number of stitches. If the pattern has a design element or a stitch pattern that will affect the gauge, you’ll need to incorporate that into your target number of stitches. To double check, use the bust circumference as a point of comparison. If the number of stitches at the widest point of the bust sweater pattern doesn’t match the stitch gauge multiplied by bust circumference on the schematic, that’s a good clue that something will need to be adjusted. Add or subtract the difference if there is one to get what will be your final stitch count at the hips.
+ Multiply your waist to high hip measurement and total length measurement by your row gauge. You will also want to make a note of how many rows make up the waist shaping in the original pattern. The number rows for the old waist shaping is the number of rows you’ll want to distribute your new waist shaping rate over, and your waist to high hip measurement multiplied by your row gauge will give you the number of rows you’ll have to distribute your new hip shaping. You’ll use the total length to figure out how many additional rows you’ll need to work after the hip shaping by subtracting all the rows worked from the shoulder through the hip shaping from it. Note that your total length may need to be adjusted to accommodate for stitch pattern repeat lengths, so make sure that any stitch pattern repeats will fit nicely before moving beyond the planning stage.
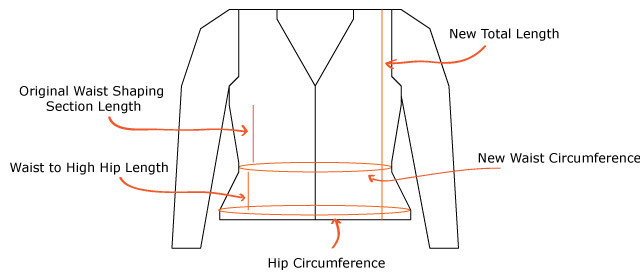
+ Calculate your ideal shaping rates for the waist and hips. Find the difference between the bust stitches and waist stitches and divide by four to get the number of increase or decrease sets you’ll need to work, assuming that you will be working pairs of increase and decreases at each side or four darts. Divide the section length by the number of decrease or increase sets and round to nearest whole number to get your increase or decrease rate for your waist. Figure out your hip shaping using the same calculations. If you’re using paired decreases at the sides and you hip shaping rate requires you to increase or decrease more frequently than every three or four rows, you may wish to go back and add a little more ease through the waist so fewer increases or decreases are needed at the hip. Shaping that is that rapid near the bottom edge of the sweater can cause the distortion issues I mentioned.
+ Combine your customization with the pattern when you knit. For a top down cropped pattern, knit the sweater as written, substituting your custom waist shaping for the shaping in the pattern. Knit about an inch or two of knitting at the waist without any shaping, and then knit the hip shaping. After that, you can knit until the sweater is your desired length.
+ Don’t be afraid to try things and rip back! Unless there’s steeking involved, you can always unravel and try something new if you don’t like the results.
If you want to learn about calculating sweaters, you can buy my Guide to Seamless Set-In Sleeves, in which body shaping for full-length sweaters and more is covered in detail, but this post should give you everything you need to know to customize the length of your sweater! The hardest part is taking the plunge and getting started, but once you get going, I think you’ll find that pattern modifications aren’t that scary.
Leave a Reply