The advice that you should block your knitting can sometimes be met with confusion when it comes to simpler stitch patterns. The internet is full of elaborate tutorials on blocking lace, because that’s a real skill, but they’ve created a misconception that blocking all knitting requires extreme stretching and pinning.
Blocking, at its simplest, is moistening your knitting so your stitches set in the correct place as they dry. Steam, a spray bottle, or a soak in wool wash can provide the moisture, and setting stitches can range from precise pinning to gently pushing them into place with hands.
Every time you wash your knitting, you will have to block it again because it will relax after its wet. Therefore, when you knit your swatch, you should choose a blocking method that’s realistic for your finished object. A lace shawl won’t require frequent washing, so blocking involving complex pinning isn’t a nuisance. A sweater, however, will need to be washed more frequently, so a more simple blocking method is a better choice. Here’s how I wash and block my seamless animal fiber sweaters. (Read my tips for washing linen in a previous blog post.)
Before we dive into my process, let’s talk quickly about felting (or fulling if you want to be accurate because we’re working with knits). Felting is the big fear with wet blocking, but if you understand how it works, you can easily avoid it. At its simplest, felting is the individual fibers coming together and holding onto each other tightly to make a denser, smaller piece. Animal fibers are made up of lots of tiny scales, and a warm, moist environment will open up the scales, so they have the potential to lock together like Velcro when they brush up against each other. It can take lot of rubbing against each other to get them really locked together tight, and it takes a combination of the warm moisture and agitation to cause felting. Knowing that, I wash my piece while carefully avoiding unintentional felting.
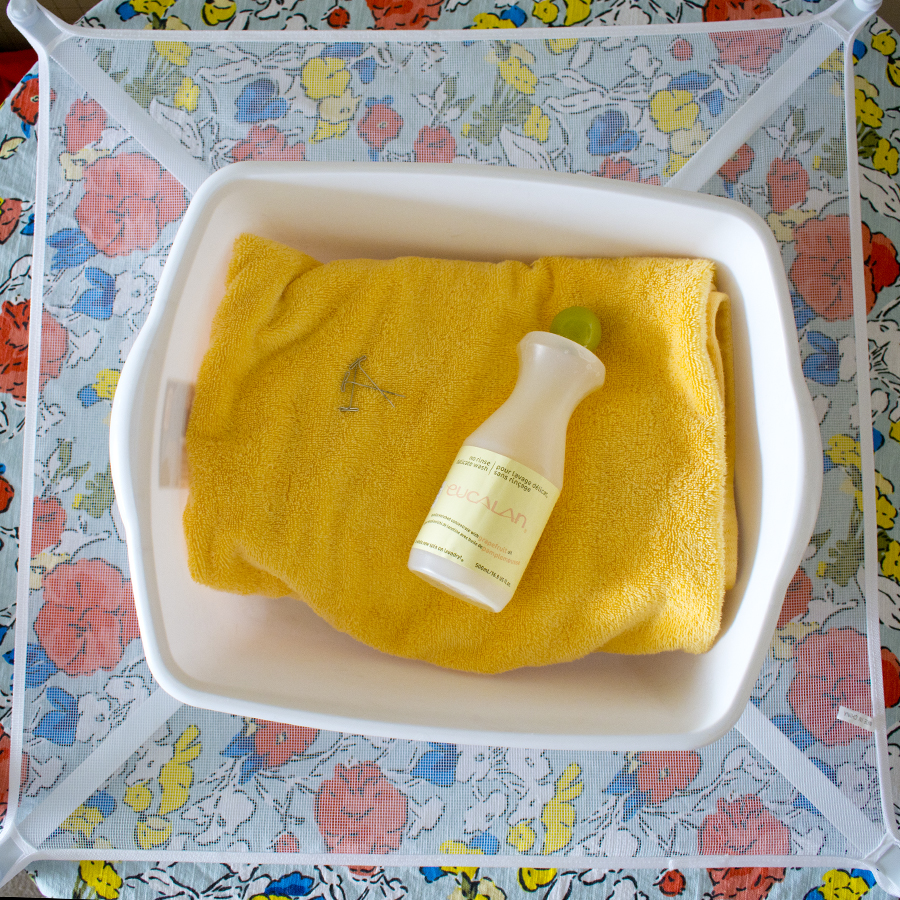
To block my sweaters, I use a washtub because my bathroom sink is too shallow for a full-length sweater. My tub was labeled as a dishwashing tub, and I found it next to the dish racks at Fred Meyer. I use a wool wash with lanolin content, like Eucalan, but I’ve also had good results with lingerie wash and extremely gentle shampoo for color treated hair. For wool projects, you want to avoid soaps or detergents that promise to strip grease or oils. Lanolin, which helps makes wool soft, is an oil, and you don’t want your wool to be completely free of it. The other supplies I use are an old towel and a sweater drying rack. Optional tools include pins and blocking wires for lace projects and a fan.
I fill my washtub up using room-temperature water. Dirt dissolves best in warmer water, but wool also felts best in warmer water, so room-temperature is a good compromise. The washtub gets filled while empty because I use my bathtub to fill it, and the agitation of the roughly pouring water has potential to felt wool. It also allows me to get the temperature right before adding my sweater. When my washtub is close to full, I add a splash of wool wash and let the pouring water mix it. I push my sweater underwater and gently press it to force any air out, so it stays submerged. Then I let it soak for 10-20 minutes. Agitation is the enemy, so there will be no scrubbing or wringing. If there’s a particularly dirty spot, like a spot of dried on cake batter, I’ll gently rub the problem area with my thumb until it’s clean.
The next step is a little awkward, but working in a bathtub make it easier. With one hand I pick up my sweater, and with the other, I empty my soapy washtub and refill it with clean lukewarm water. Once again, you don’t want to have your sweater in the washtub while water is pouring into it because of the agitation, but you also want to avoid having your wet sweater stretch and sag while holding it. It’s kind of awkward and challenging to do without dripping water everywhere. Once the washtub is full of clean water, place your sweater back in, give it a few gentle squeezes, and then let it soak for another 5-10 minutes. I use a no-rinse wool wash, so I sometimes skip this step if I feel that my knitting isn’t very dirty, but I like to do a rinse if I’ve been wearing my sweater a lot.
After my sweater is clean, I dump the water out of my washtub, and while holding it at an angle so water pools to one side, I push my sweater against the opposite side to squeeze out some water. The goal is to press the water out without any agitation or wringing. To squish out more water without agitation, roll your sweater up in a clean towel and press straight down on it, moving along the length of the roll so that the whole sweater gets pressed. Avoid the temptation to twist and squeeze!
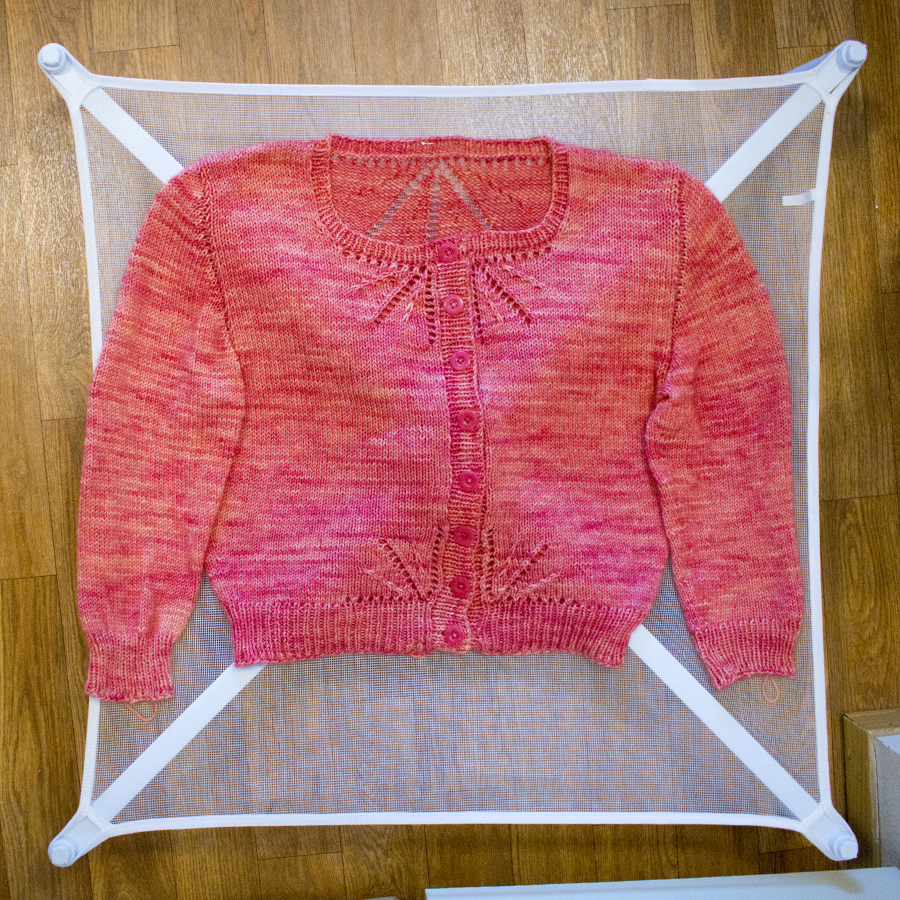
With the excess moisture pressed out of your sweater, it’s ready to reshape and lay flat to dry. On a waterproof surface, blocking mat, or sweater drying, rack, lay your sweater out flat. I highly recommend using a sweater drying rack if you live in a damp climate because it allows airflow on both sides to speed up the drying process. If your sweater is a cardigan, button it up at this point. Take a measuring tape, and adjust your sweater to match the schematic. Note that you will want to treat your sweater the same way as your swatch. If you heavily stretched and pinned your swatch, you’ll need to heavily stretch and pin your sweater. If you simply reshaped and laid your swatch flat to dry, you can do the same with your sweater. If there are lace details, you may wish to use a few pins to keep the lace neat and tidy around the edgings, but the weight of the sweater is frequently sufficient. I used just one on the cardigan above to hold the back neckline straight. To speed up drying, place a fan so that it blows across the sweater, and the circulating air will help the moisture in your sweater evaporate more quickly. If you didn’t use a sweater drying rack, you may want to flip your sweater after the top feels dry, so the bottom layer gets enough air.
And that’s it! As a messy, slightly disastrous person, I try to keep things simple so washing and blocking my sweaters isn’t a huge chore. I do very little pinning in the swatch phase so I’m not committed to doing it when I wash and block my final piece. This method doesn’t take long (except for drying time), and it makes sweater care a breeze.
Leave a Reply