How to Add a Lifeline

Ripping back lace can be tricky. When stitches drop down, it can be difficult to see which go where and what row they belong to, so many knitters like to use lifelines if they’re not feeling confident about their lace. Lifelines are lengths of scrap yarn that are run through rows of your knitting and left until you feel confident that you won’t need to rip back to that point. If you do need to rip back, your stitches can’t drop down further than your lifeline, so you just need to follow the path of it to put them back on your needle. If you don’t need to rip back, you can simply pull out the scrap yarn with no harm done. This is just one of many methods to add lifelines, but it’s a good choice to pair with Zinone because it’s easy to work on plain rows.
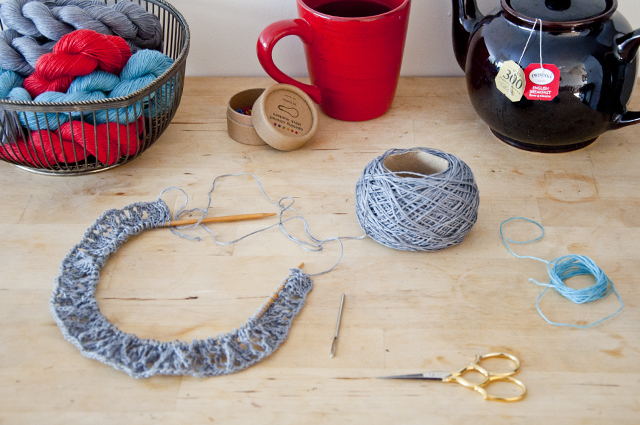
OAL_Zinone_LifeLine_Supplies

To add a lifeline, you need your project on circular needles, a yarn needle, and a piece of slick, fine-weight scrap yarn that’s comfortably longer than your project’s width. Linen and cotton yarns are good choices for your scrap yarn because they won’t felt or stick, so I used leftovers from my first Zinone. You can add your lifeline on any row, but it will be easiest to insert just after you finish working a plain row, like the purled wrong-side rows on Zinone.
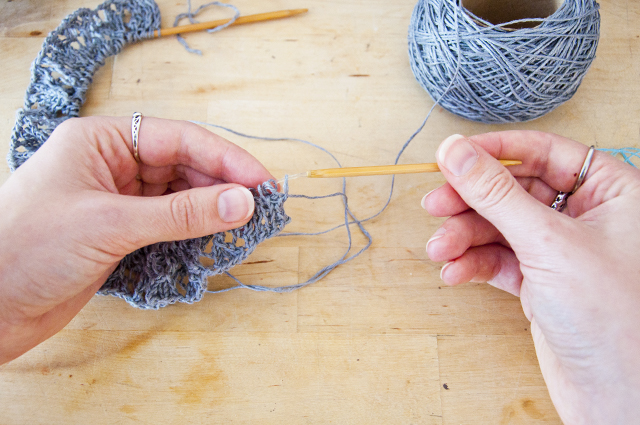
OAL_Zinone_LifeLine_Step1

Slide your knitting back off of the shaft of your needle onto the cable so the stitches are slack.
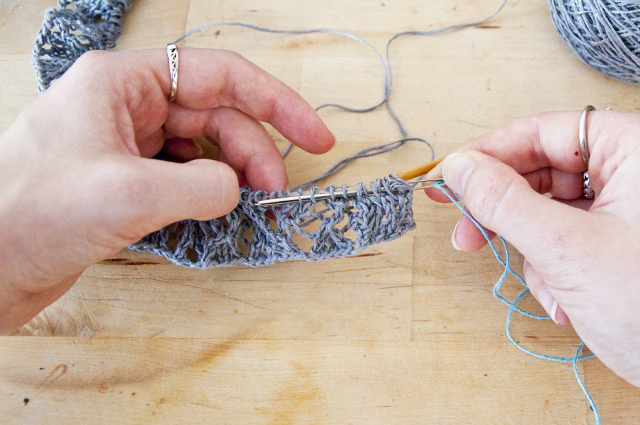
OAL_Zinone_LifeLine_Step2

Using the yarn needle, run the scrap yarn through the live stitches following the path of the circular needle’s cable. You want to go straight through all stitches, including slipped stitches, and YOs if there are any.
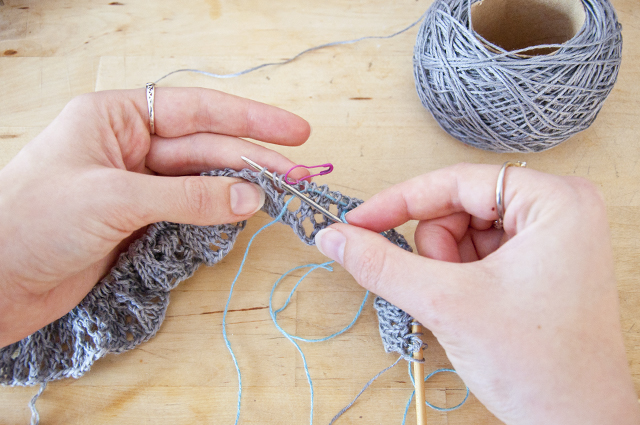
OAL_Zinone_LifeLine_Step3

If you have any markers, be sure to go around the outside of them so the lifeline doesn’t go through them. You only want to capture stitches. If you go through the marker, it will get trapped, and you’ll have to cut it or the lifeline if it’s not a removable marker.
OAL_Zinone_LifeLine_Step4

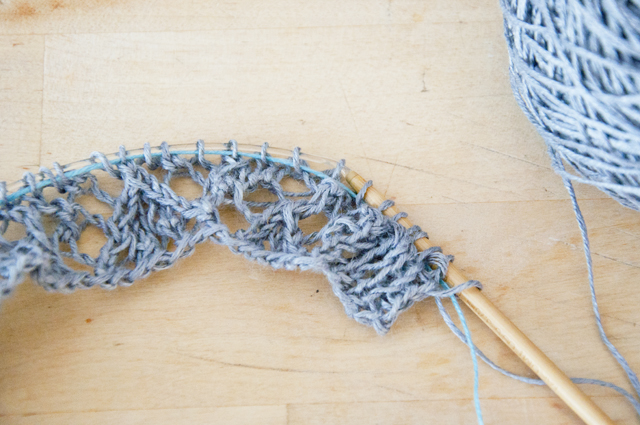
Once you’ve gone through all stitches, make sure you have a long enough tail on either end of your project that your lifeline won’t escape. You can just leave the ends dangling. Your length of scrap yarn should run parallel to your circular needle, from the beginning to the end of the live stitches of your project.
OAL_Zinone_LifeLine_Step5

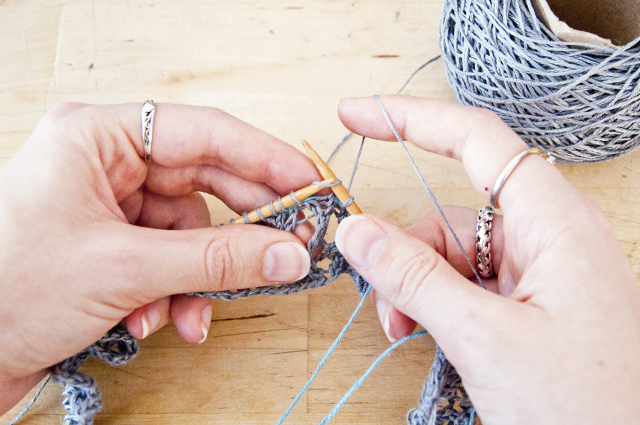
With your lifeline in, you can get back to knitting like normal. All you need to do is be careful not to disturb your lifeline. You don’t want to knit through it or involve it with the new row. Let it fall to the bottom of the stitches it’s inserted through and knit as usual. It might look funny when you work decreases, but as long as it’s staying in the row below, you’re fine.
OAL_Zinone_LifeLine_Step6

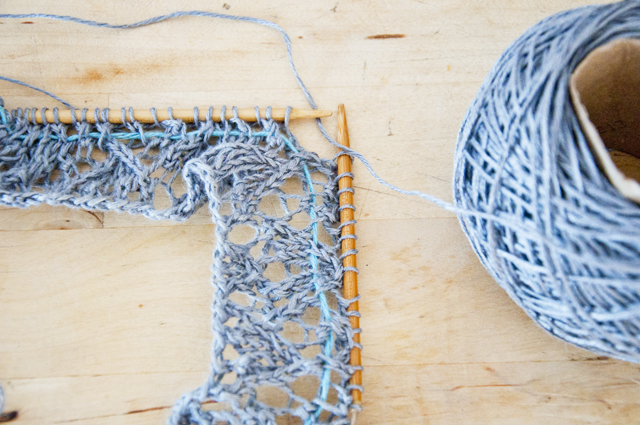
Keep on knitting with your lifeline in place. It will be an easy point to rip back to if you need to because your stitches will stay exactly where they are on it, and you can easily remove it after you add another lifeline, get to the point where you feel more comfortable, or finish your project. If you’re not entirely confident about your lace, consider adding a few lifelines to your project so you can rip back without worry.


Posted

in

by

Comments

16 responses to “How to Add a Lifeline”

  1. Cheryl

    Mystery solved – great tutorial!

  2. Alison

    Great tutorial, the only thing I do differently is to include the stitch markers when I pass my lifeline through. I just add a new set at that point as I work the next row. This means I also have markers in place if I do need to rip back, and they drop straight out when I pull the lifeline out as they are only attached by being on the waste yarn.

    1. Serena

      That’s so simple yet brilliant!

    2. Melanie

      Thanks for sharing that! With this tutorial and your tip, knitting lace won’t be “flying without a net” anymore 😀

  3. Diane Smith

    What a brilliant idea!

  4. Ann

    Could have done with this 2 months ago when I knitted a horror of a pattern ……….. even after Id completed the back the front panels weren’t clear, the pattern was only 6 rows and Im an experienced knitter!! What a nightmare and it was for a friend.

  5. Stephanie

    It never occurred to me to put a lifeline in on a plain row. Thank you for another great tutorial.

  6. Sabine

    Thanks so much for this!! This is my first time working with lace and so far every time my stitch count is off I’ve had to start over again!! I was afraid I’d have to be perfect or else I’d never get it done.

  7. Sarah

    This is exactly what I needed! Especially since something about the yarn (using Sparrow) is making it really hard for me to see the stitches clearly, whereas that’s normally not a problem for me. Thank you!

  8. Lorene Frischknecht

    I’ve used a lifeline several times on big or more complicated knit projects and it works wonders! Makes it much easier to fix mistakes!

  9. Frankie

    Oh hahaha! I wish I had know that in last year’s OAL! It was my first knitted garment and my first lace piece. I cannot tell you how many times I had to frog the whole piece! And being pregnant at the time, I gave into my frustration and just gave up! Fast forward to 2016. I’m going to finish it this year lifelines are going to help me! (and maybe between work and having babies, I will get last years OAL done, too!…yeeah…)

  10. Thanks for this. I’m knitting a horror show of lace so I will put this in practice right away!

  11. Fuego Azul

    Thank you for reminding me! I’m knitting a lace shawl & debating whether or not I should add an extra repeat in order to make it larger. Your tutorial is great!

  12. Mary Kate

    What an excellent tip! I’ve always had trouble with lace because I would make a mistake and be unable to rip out and start again.

  13. Thank you so much for this tutorial, I feel much more confident to start knitting lace now, which is great because I love the look of lace.

  14. Amanda

    Your amazing,this is a skill i need to pick up asap and now I think I can get it.

Leave a Reply

Your email address will not be published. Required fields are marked *

This site uses Akismet to reduce spam. Learn how your comment data is processed.